


I was not born a baker. I wasn't even born with a love for baking. I have a couple of girlfriends (and one guy friend too!) who live and die for baking. They can't wait until the weekend to make fresh bread, cupcakes, pies from scratch — you name it.
They post amazing pictures on social media and I, meanwhile, look at my biscuits that are lopsided, not uniform and don't really look anything like biscuits, either.
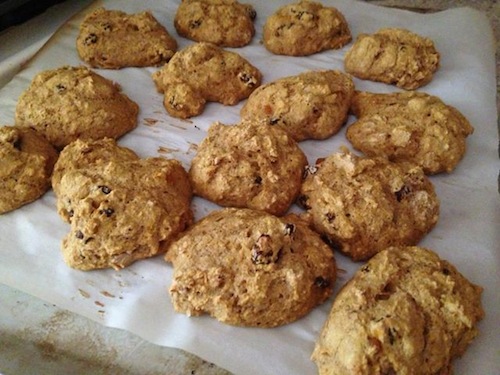
*Happy Herbivore fat-free whole-wheat vegan cinnamon Raisin Biscuits made with pumpkin instead of applesauce.
I mean, my biscuits were delicious! Don't get me wrong, I just didn't give them that sweet love. I plopped them down on the cookie sheet "getting it over with" because I wanted biscuits. (My lack of patience extends to all foods — probably why I never use a slow cooker and most recipes take 10 minutes.)
I just want to eat already!
My friends — the bakers I mentioned — hate listening to me talk about my baking. It's like nails on the chalkboard for them: "What do you mean you don't sift your flour?", "You combine everything in the same bowl? What! Are you nuts?", "Lindsay, you *have* to let things rise twice!" and so on.
I know, I know, I'm such a rebel.

Now, I recognize I'm probably not selling myself as an authority on how to be a good baker — but because I'm so bad at baking, and because it's a chore for me (I just want blueberry muffins already!) I've learned some tricks of the trade to get me through.
Even living at high altitude, it's rare I have a blunder, and anytime I do, I know it's because I skirted some of the rules.
If you're an expert baker or someone who loves baking (like my friends), all of this is probably "old news" to you, but for my readers who like muffins, cakes and cookies (esp. healthy, low-fat, plant-based, vegan ones) and think they stink at baking, or they just want to whip it up quickly and shove it in the oven... this is for you!
Rule #1: SPOON, Don't Scoop.
Always use the spoon & level method for measuring flour.Do not scoop the flour out of the bag with your measuring cup. Spoon flour from the bag lightly into the measuring cup. Do not "pack" the flour. Also avoid "tapping" the measuring cup (this causes flour to settle and become more dense). Lightly shake off the excess or use a knife to gently level it off.
Note: My "baker" friends weigh their flour, as opposed to measuring it. I'm too lazy to do this, but if you're a little more hardcore than me: 1 cup of flour should weigh 4.5 ounce or 128 grams.
I also apply this rule to instant oats, but with rolled oats I "cheat" and scoop with my measuring cup. 1 cup of rolled oats should weigh 3 ounces or 85 grams.
With sugar (i.e., raw sugar or brown sugar), you can scoop it with the measuring cup, unless you want to scale back on how much sugar you're using, then you can use the spoon method. In most recipes, the sugar should be "packed tight" and leveled off, unless directed otherwise. I tend to scoop it lightly and I never pack it down tightly.
Powdered sugar is the exception — you want to sift that, if you can, to prevent lumps. However, since I only make a glaze with powdered sugar, I find I can sufficiently whisk the clumps out making the glaze, thereby not needing to sift it. Yet, if your powdered sugar (confectioners' sugar) is going toward anything other than a glaze or whippable icing, you might want to consider sifting.
Liquids (such as non-dairy milk) should be at eye level in a liquid measuring cup (though I admit sometimes I use dry measuring cups. whoops!).
Rule #2: Baking Agents
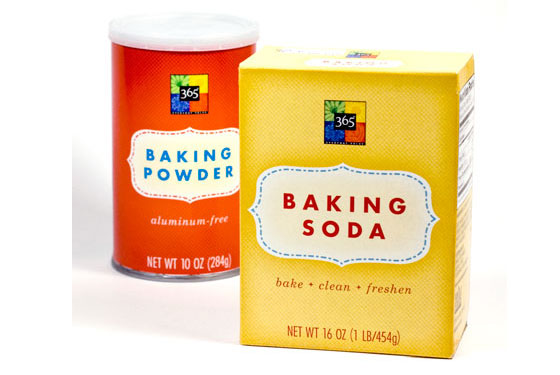
Baking powder andbaking soda are not interchangeable and you generally do not want to tamper with or alter the amounts called for in a recipe.
Before measuring, I always give my baking soda or baking powder container a good shake, hitting it on the counter so the contents aren't packed down as tight. Use your measuring spoon to lightly scoop the baking powder or baking soda (there should be a mound), then use the back of a knife to level it. Some canisters have a leveler in them, and those are fine too.
Also, mark the date of purchase on your baking soda or baking powder canister. Toss after 3-4 months. While the general rule is 6 months, I find that's "at best," plus you have no way of knowing how long the item sat on the grocery store shelf before you bought it. I replace mine every 3 months like clockwork. If you bake often or use baking soda for household cleaning or washing your face too, you might use them up before expiration.
For more information, see my post Baking Soda vs. Baking Powder — What's The Difference?

Rule #3: Mix Dry Before Adding Wetness
Before adding "wet" ingredients like non-dairy milk and applesauce, you want to whisk all the "dry" ingredients together: flour, baking powder, baking soda, cocoa, etc. I use a whisk or, if I'm desperate, a fork, to do this. My baker friends sift. (I don't even own a sifter — the horror!)
Note: This is a step you don't want to skip! Mixing it all together ensures even distribution of your leavening agents (baking powder and/or baking soda). If they're not mixed even throughout, disaster awaits.
Generally, bakers consider "sugar" (as in dry sweetener) a "wet" ingredient, but I don't. I always mix it with my other "dry" ingredients. If my sweetener is a liquid, however, such as maple syrup, then I hold off and add it with the other wet stuff.
Rule #4: Stirring
After you've mixed all your "dry" ingredients together, next comes the "wet" ones. After these are added, stir it all together but stir it gently. Use as few strokes as possible and stop when it's just combined. Over-stirring the batter and really whipping the heck out of it can ruin your goodies before they even hit the oven. I find this is especially true with healthy baking (i.e., using whole-wheat flours, oat flours, gluten-free flours).
Rule #5 (optional): Know Your Conversions
4 tablespoons = 1/4 cup
1 tbsp = 3 tsp
1 cup = 8 fluid ounces
2 cups = 1 pint
4 cups = 1 quart

BONUS TIP: Need a good vegan substitution for an egg glaze in baking? Try almond milk, maple syrup or apricot jelly!
For more tips on baking, including everything you need to know about flours, gluten-free baking, fat-free baking, oil-free baking, sugar-free baking and beyond, see my all-encompassing Baking Post.
Happy baking!

